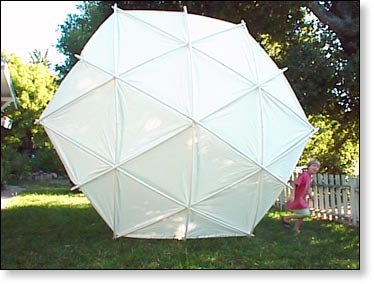
Shelter Systems’ RoofShell™ Structures are thin sections of spheres or tunnels made from a lightweight, strong, waterproof, ripstop film which is either white, translucent or black/white. They are useful for making jacuzzi covers by simply setting them over your spa; rain and sun porches by tying them to
buildings, poles or trees with our attached clips; portable greenhouses by setting them on the ground or over a hole you’ve dug and can then walk into (ventilation can be provided by propping up one end); quick sheds by setting them on 8′ 4×4’s sunk in the ground with plywood walls attached; and other low-arched roofs.
Wind and Snow Warning: Your RoofShell is a lightweight structure, therefore extreme  wind sites are not recommended. When possible, avoid exposed hilltops and narrow valleys where wind speed increases. Trees and brush between you and the wind help protect your shelter. Your RoofShell could be destroyed in extreme weather
and your life or safety could be at risk. In heavy snow or wind your dome could collapse, damaging what you have or compromising your shelter. Do not rely on your RoofShell as your only shelter. Accumulated snow, must be melted or shaken off.
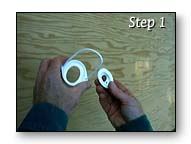
1) Assemble your poles by joining the six poles with flared ends to six poles that are not flared.
2) Spread out the covering so that with the clips with the cord loops and the center clip with connectors are facing up.
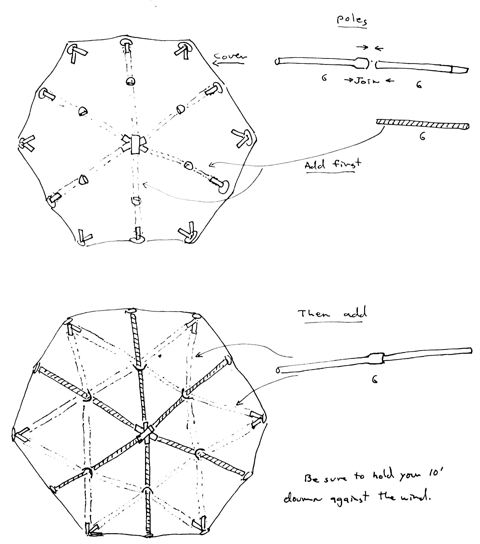
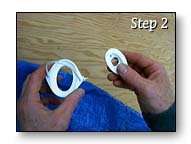
3) One at a time, slide the six remaining unjoined poles through the clip loops and into the connectors at the center of the covering. Then bend the poles upward slightly and insert the plugs attached to the coverings perimeter clips into the poles outer facing ends.
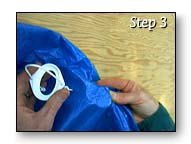
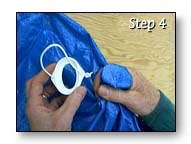
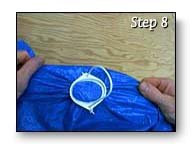
4) Now proceed one at a time to slide the six joined poles through the covering loops so that these six poles lie parallel to the poles that cross at the center. Insert the plugs attached to the coverings perimeter clips into the poles outer facing ends (You may need to push on the poles causing them to bend upward slightly to get both end plugs in.
Repairs: Your RoofShell is designed to be durable and problem free. However, some of our customers use their structures for so many years that eventually  they need some maintenance. A broken pole can be repaired with a wooden insert such as a piece of broom handle or a straight stick. Poles can usually be obtained from a building supply or plumbing store. Ask for class 200, class #125 or schedule 40 will also work. Poles may also be ordered from Shelter Systems (send length and size).
Broken connectors can be replaced with class 200 PVC (1-1/4″ for the 20′ and 18′ domes and 1″ for the 8′, 10′, 11′, and 14′ domes). The simplest way to repair a hole or cut in the covering is to cut a patch from the material the dome came wrapped in. Use silicon rubber to glue your patch on the outside of the tear. If the tear is small you may be able to plug it up with a blob of silicon rubber alone.
It is best to replace a whole panel if a tear is immediately adjacent to a clip. Order the same panel from Shelter Systems.
1) Arrange the replacement panel over top of the damaged panel so that it is in the same orientation.
2) Remove only one clip from your dome being careful not to disrupt the layering sequence of the panels on your dome.
3) Take your time to carefully slide out the corner of your damaged panel and insert your replacement panel into the same layering sequence as that of the damaged panel.
4) Now with all layers in the same order and orientation as before; gather these tightly around the male clip and slip over the female clip as described below.
When many layers are involved as is the case with the corners of the windows, attaching the female clip can be difficult; practicing on scraps and making the layers warm with the sun or heat lamp (be careful not to melt the covering by getting it to hot) can help. If your dome is flattened by snow, carefully remove the snow without tearing its covering. You may find it will pop back up or that you have to remove some of the poles and set up again. Replace any broken poles.
WARNING: Your Roof Shell could be destroyed in extreme weather and your life or safety could be at risk. In heavy snow or wind your yurt could collapse, damaging what you have or compromising your shelter. Do not rely on your RoofShell as your only shelter. Accumulated snow, must be melted or shaken off periodically. Do not set your Roof Shell under a tree or branch that might fall on you. Keep all flames and heat away from your RoofShell’s covering and objects in your RoofShell.
Patented. Others pending. shelter-systems.com